Lisa Holmes MA Photography
An exploration of how female emotions can be represented through an external metaphor within the narrative of a (self) portraiture
Tag Archives: photoshop
Reborn (LO1)
A big inspiration in my current photography and drive to insert more narrative into my portraits is Brook Shaden. I really appreciate the beauty of her work both technically and aesthetically. For me, all her images center around emotionally driven concepts, creating fantasy worlds that allow the viewer to submerse themselves into and apply their own narrative and emotional connection. The ability to create that emotional connection with the viewer is something I would like see in my own work.
With this in mind I recently carried out a shoot in the woods based on the theme Reborn. My intention was to create an image that was fluid, had a feeling of serenity and which represented the emotional release of shedding negative baggage to become free and pure. The narrative of the image was about letting go of negative emotions and freeing yourself of their ties. This would be portrayed by various elements within the scene such as the woods to represent nature, the white fabric, which I wanted to flow around the image, to represent the new feeling of purity and emotional freedom and the birds to represent the dispersing negativity.
My set up for the shoot was quite limited; using natural light and my DSLR. I had one prop which was a single white bed sheet I had ‘borrowed’ from the local YHA. Prior to shoot I had visualised what I wanted to achieve, which was a large amount of flowing fabric around the scene. As I only had a small sheet I knew it would have to be a composite image. To achieve this I shot my main image, which focused on the model in the correct pose, then I asked the model to move the fabric into different positions while I continued to photograph them, with the intention of later stitching the images together in Photoshop.
My final image is clearly unsuccessful due to a number of failing, the first and most significant being my lack of abilities in Photoshop. This was my first attempt at a composite and it clearly shows through the naive editing skills resulting in the model looking like she has been superimposed into the image. The images below show the initial shots that I worked with. and also highlight how the shoot itself could have been improved significantly with the use of a tripod and better planning.
Although this style of photography clearly highlights my lack of experience in creating this type of image I do intent to try again. When I compared this image to my studio work, it looks very poor quality both aesthetically and technically which does make me consider whether I should forget this style and focus on a type of photography I know I can achieve to a high standard. However as I do now want let my technical skills drive my images, but rather my visual intention, I will plan another shoot which again involves a clear story and theatrical element.
Adobe Lightroom Batch Processing (LO4)
The aim of this post is to detail the steps I take after each shoot to post process my images.
After every photoshoot I need batch process all the images I have taken. On a shoot I can take anything up to 200 RAW images, therefore it is important I have a smooth and efficient workflow system that allows me to process image quickly. This is especially important when I am working on commercial jobs, as the more time I spend post processing, the lesson profit I make.
To enable me to do this I use Adobe Lightroom to batch process. It is an excellent workflow management tool, which greatly reduces the time it takes me to work through a large amount of files. Some people also use Lightroom as an editing tool, in place of others such as Adobe Photoshop. My preference is to use Photoshop for individual image editing as I feel it allows me greater creative control.
When starting my batch processing the first thing I need to do is import all the images from the shoot into Lightroom. You can set this as an automatic function that happens when you plug in a memory card, however I choose not to do this as I do not want all my images to go through Lightroom. To manually import the files you click the import button in the Library section and select the relevant folder. The images will then appear in a filmstrip at the bottom of the page.
Next I use Lightroom’s star rating system to help me whittle the images down to a more manageable amount. For me this is one of the best functions of Lightroom as it can save a huge amount of time and it is very easy to do. For every shoot there are images that I know instantly are not usable. Therefore I carry out a two stage selection process. Stage one is to remove any images that are instant fails. This could be because they were test shots, images where the flash misfired or where the model has their eyes shut etc. To remove these from my workable selection, I give a star rating of 3 to all the other images. I then choose to only see on my screen image with a 3 or more star rating. Instantly the number of images I am working with has reduce. The second stage is to work through the remaining images, this time looking at them in more detail. At this stage I can also see if I have similar shots where one can be removed. Any images I want to continue working with I allocate a 4 star rating. Once this is completed I choose to only see images with a 4 or more start rating. At this point I can see how many images I have left. If I feel I need to reduce the amount again, I can repeat the process giving images a 5 star rating.
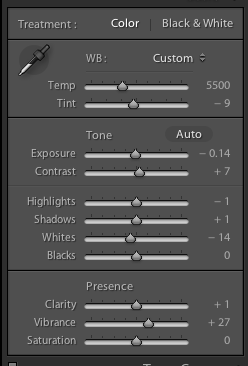
Once I have my final selection of images that will go through to post processing in Adobe Photoshop, I apply some basic alterations in the Development section of Lightroom. Firstly I need to correct the Camera Calibration. When Abode imports my RAW files it automatically applies the Adobe Standard colouring to all my images. This means the colour of the images will be different to how they are viewed on my camera. It is important that my camera and computer are colour calibrated so to correct this I go to the Camera Calibration panel and change the setting to Camera D2X Mode 1. This is a plugin for Lightroom that tells it the correct colour setting to apply to match colours as seen on my Nikon D90. These calibrations settings need to be downloaded and imported into Lightroom and will vary for different camera models.
Next I will correct any white balance issues. On shoots I usually use a white card to set my white balance in camera, however if I have not done this I can correct any colour issues in Lightroom using either the droplet tool or the sliders. You can also apply the adjustment to all your images at the same time by choosing AutoSync. This ensures consistence throughout your images, which can be especially important for product photoshoots. Finally I will make some exposure corrections if necessary. As the images are shot RAW I am able to fine-tune the exposure without losing an image quality.
Once this is all completed my images are ready to be exported as Jpegs to a new folder. I do not reduce the size of the images when exporting them, but I do set the DPI to 402, as this is the required resolution for my printers.
The Ethics of Post Production (LO5)
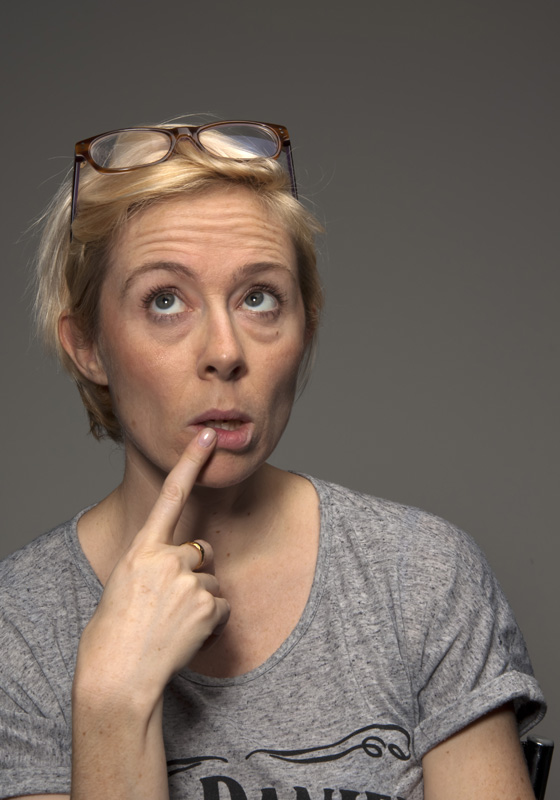
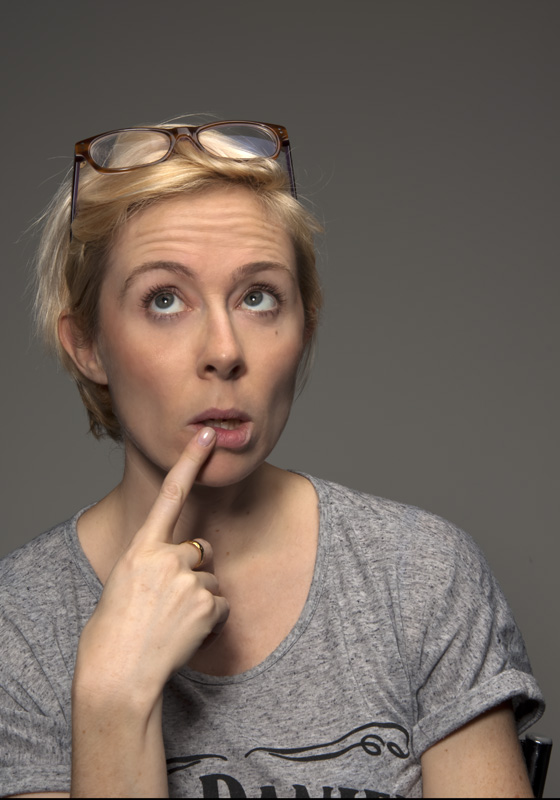
In this post I want to consider the ethical side of post-production. Skin smoothing, blemish removal and a quick nip and tuck here and there is generally standard practice in most post-production today. It is now current knowledge that the images we see daily in magazine, posters, advertising and on website of people are not a true representation of that person. This is generally an accepted practice apart from the odd celebrity who now and again likes to voice their disgust at it, in a lame attempt to show their moral viewpoint on the subject of female representation in the media. My concern however is not about the mass opinion of how post production should and shouldn’t be used within the media, but more about a personal ethically choice to represent the true within my own artwork. As this project has strong links to my own feelings and emotions, and aims to document my own pursuit of happiness, as well as other, it is not surprising that throughout it I will be takings numerous self portraits. And it is this representation of myself that I want to consider when thinking about just how much post-production is suitable. Below are two images that were taken as part of a test shoot last week. The first image is as shot with no post-production apart from being resized for the web. The second image, clearly, has had some work on it. I didn’t go crazy with the editing, just some blemish removal, subtle skin smoothing and most notable removal of the large bags under my eyes. When the images are show together the post-production is clear to see, however if I had not put the first image on I wonder how must of the editing would be noticeable to the unknowing viewer? My next concern was if, by removing features that are representative of my stress and ordeal, such as the bags under my eye, I am being untruthful within my image.
After thinking about this my opinion is that it clearly depend on what I am trying to express in my art. For example the image in my previous post is not about my true physical state but more an rhetoric play on my emotional state of mind. The aim was to produce a polish external appearance that clashes with the message on the stickers; therefore skin smoothing was necessary to create the final image I wanted. However the image in this post could be quite different. This was actually just a test shot, but if the aim, for example, was to show how my emotional situation had impacted on me physically, then to edit physical features out for the sake of vanity, I believe would be untruth and wrong. It would also defeat the point of the image.


